Asthma? 5 powerful yoga poses for asthma problems

Asthma ,5 powerful yoga poses for asthma problems, obviously, is an ongoing incendiary sickness of the respiratory plot. Be that as it may, what you probably won’t know is the manner by which normal this condition is. Around 300 million individuals overall are experiencing the issue of asthma. In India alone, 1.31 billion individuals are asthmatics, out of which around 6% are youngsters.
Yoga can be gainful for asthma patients
Life of asthma patients is brimming with occurrences of windedness, wheezing and hacking, which makes it hard for them to do even the least difficult day by day undertakings. Anything can trigger the hacking and shortness of breath – like taking two stairways or interacting with dust or residue particles. These little things can leave them panting for air and wheezing for quite a while. It is absolutely impossible to fix the illness. Nothing remains at this point but to deal with the manifestations and forestall the triggers.
Meds are compelling, however way of life changes assume a similarly significant part. Remembering yoga for the routine can be a powerful method for dealing with the indications of asthma and keep the lungs sound. The following are 5 helpful yoga represents all asthmatics should attempt.
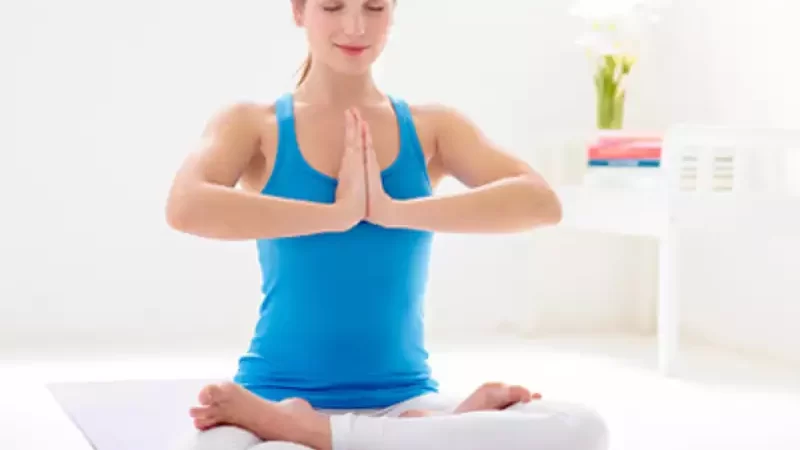
Nadi Shodhana or Alternate Nostril Breathing
The most effective method to get it done:
Stage 1: Sit down easily in Sukhasana present (crossed legs) on the ground with your spine erect and bears loose. Take in and out to make yourself agreeable in this position.
Stage 2: Rest your left hand on your thigh in contemplation present (join the top of your thumb and forefinger).
Stage 3: Bring your right hand in Nasagra mudra (crease your center and forefinger).
Stage 4: Now close your right nostril with the thumb of your right hand. Take a full breath with your left nostril and afterward close it with your ring and little finger.
Stage 5: Remove your thumb to open your right nostril and inhale out.
Stage 6: Again breathe in from your right nostril, close it with your thumb and breathe out with your left nostril. Rehash this multiple times to start with then you can build the count.
Ardha Matsyendrasana or Half spinal wind present
The most effective method to make it happen:
Stage 1: Sit on the ground with your legs extended before you.
Stage 2: First curve both your knees. Presently drop your left knees on the mat and carry the right knees to close (right foot over your left knees). Presently bring your left lower leg near your right thigh.
Stage 3: Raise your right arm upward and afterward assume it back and position your hand on the mat behind your hip.
Stage 4: Now raise the right arm upward and place it back (totally extended). Keep your left hand on your right leg.
Stage 5: Turn your neck, abdomen, and shoulders towards the right, to see over your right shoulder. Keep your spine erect and take a couple of breaths.
Stage 6: Hold this posture for a couple of moments and afterward return to the beginning position. Rehash something very similar on the opposite side.
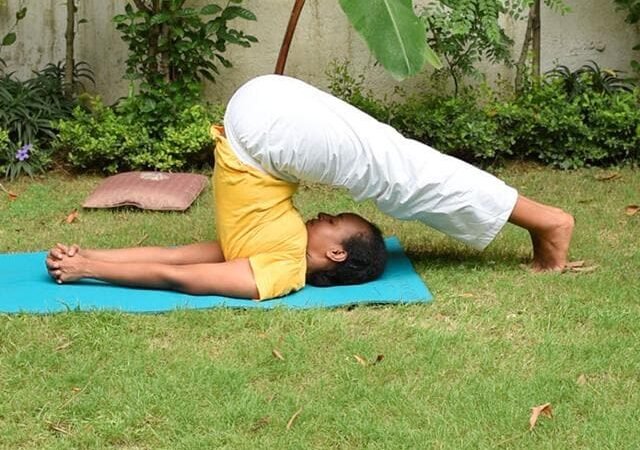
Bridge Pose or Setu Bandha Sarvangasana

Step by step instructions to make it happen:
Stage 1: Lie down on your back with your knees twisted and feet level on the ground. Your legs ought to be somewhat separated from one another and arms resting close by.
Stage 2: Press the feet into the floor, breathe in and tenderly lift your hips up moving the spine off the floor.
Stage 4: Press your arms and shoulders on the ground to lift your chest.
Stage 5: Engage your legs and butt muscles to lift your hips higher. Stand firm on this footing for 4-8 breaths and afterward return to the ordinary position.
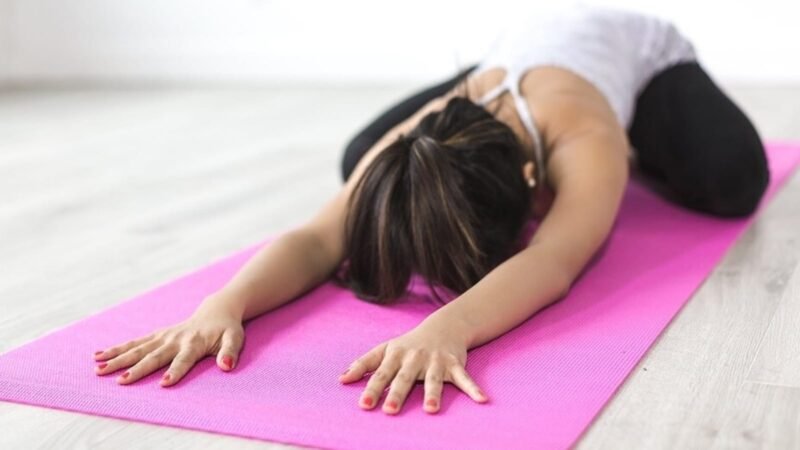
Butterfly posture
Instructions to make it happen:
Stage 1: Sit down easily on the mat with your back straight and knees bowed.
Stage 2: Move your bowed knees to the external side so the soles of both your legs meet at the middle.
Stage 3: Hold the lower legs of both the feet with your hands.
Stage 3: Engaging your abs, gradually twist your body forward, towards your feet to the furthest extent that you would be able. Hold the posture for 30 seconds to 2 minutes and afterward unwind.
Pavanamuktasana or Wind-Relieving Pose
Instructions to get it done:
Stage 1: Lie down on your back on the yoga mat. Hold your feet together and your arms close by.
Stage 2: First breathe in and when you breathe out bring both your knees towards your chest.
Stage 3: Your thighs ought to be squeezing your body and fasten your hands around your legs.
Stage 4: Hold this posture for a couple of breaths. While breathing out, fix the grasp and when breathing in relax it.
You might also like Best 7 Yoga asana for diabetes patients